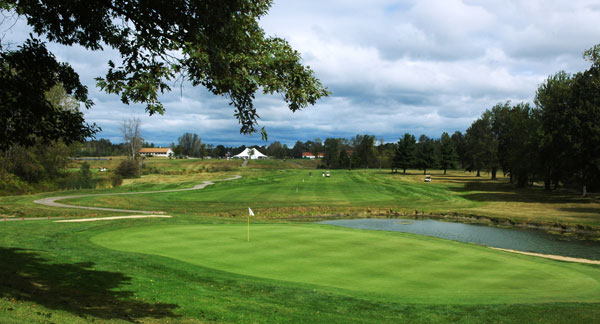
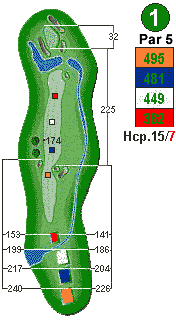
Hole 1
Avoid fairway bunkers for an easy lay-up. Too long and risky to reach green in two.
![hole-01](https://www.pebblewoodgolf.com/3292070/wp-content/uploads/sites/7197/2018/11/hole-01.gif)
Hole 2
Left center of the fairway is best position for an open shot to the green.
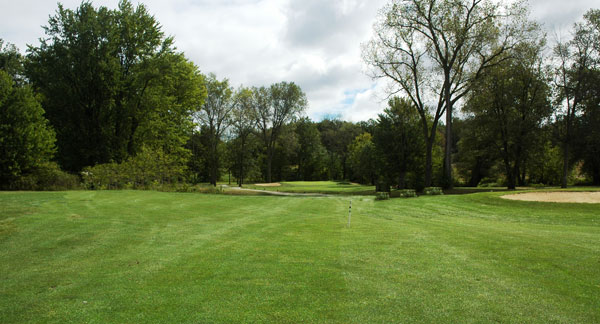
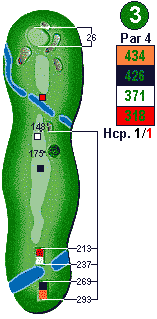
![hole-02](https://www.pebblewoodgolf.com/3292070/wp-content/uploads/sites/7197/2018/11/hole-02.gif)
Hole 3
A strong drive is required to have a long second shot to this small well-bunkered green.
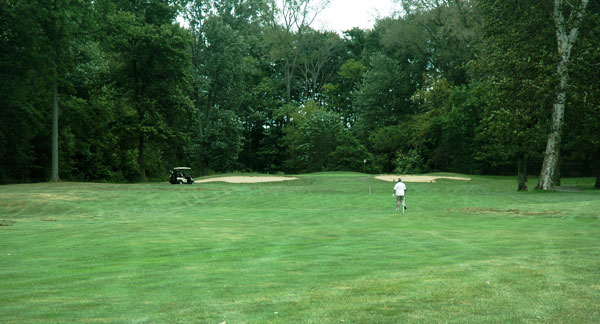
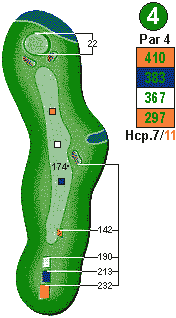
![hole-03](https://www.pebblewoodgolf.com/3292070/wp-content/uploads/sites/7197/2018/11/hole-03.gif)
Hole 4
Avoid the long fairway bunker for best shot into this small well-guarded green.
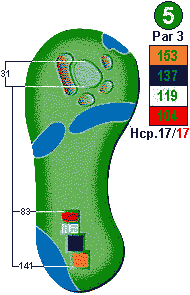
![hole-04](https://www.pebblewoodgolf.com/3292070/wp-content/uploads/sites/7197/2018/11/hole-04.gif)
Hole 5
Club selection is crucial. Take an extra club as all the trouble is short of the green.
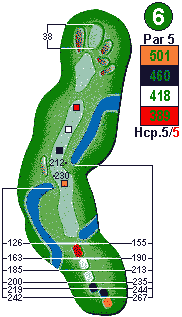
![hole-05](https://www.pebblewoodgolf.com/3292070/wp-content/uploads/sites/7197/2018/11/hole-05.gif)
Hole 6
Tee shot in the fairway is a must. Aim second shot a lot farther than you think.
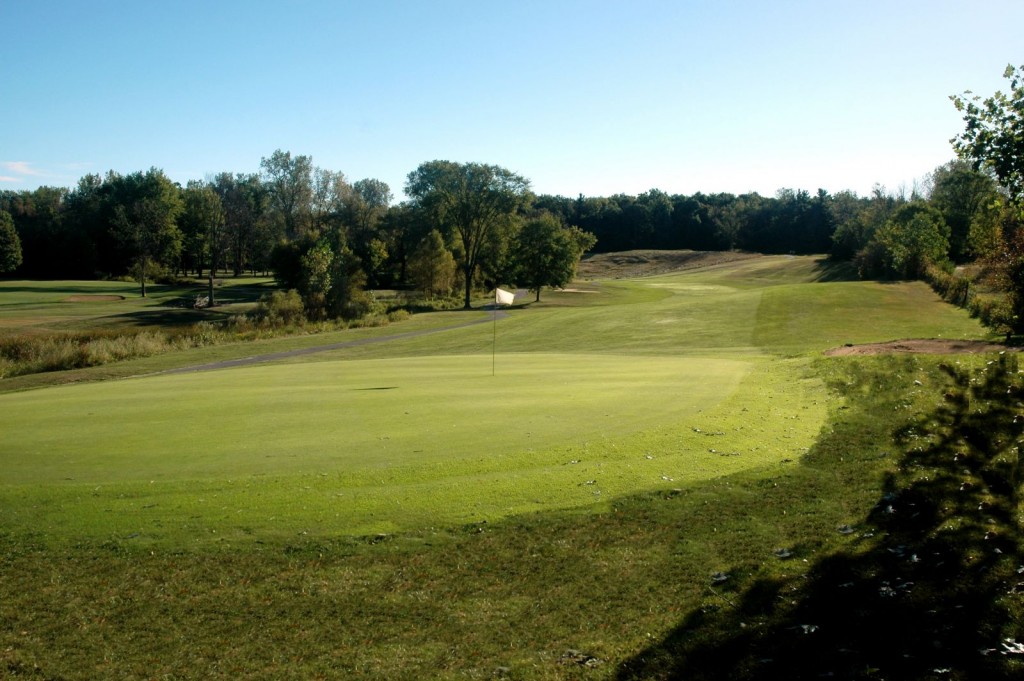
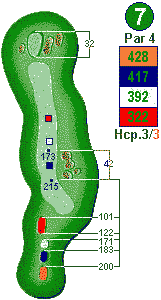
![hole-06](https://www.pebblewoodgolf.com/3292070/wp-content/uploads/sites/7197/2018/11/hole-06.gif)
Hole 7
Take an extra club on your second shot going up the hill. Keep the ball below the hole on this tricky green.
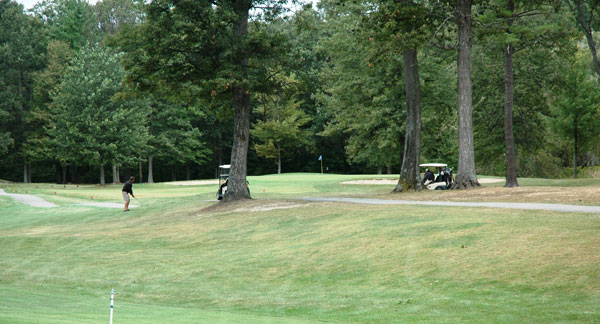
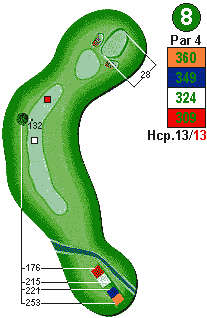
![hole-07](https://www.pebblewoodgolf.com/3292070/wp-content/uploads/sites/7197/2018/11/hole-07.gif)
Hole 8
Avoid the trees on the right and this hole plays easy.
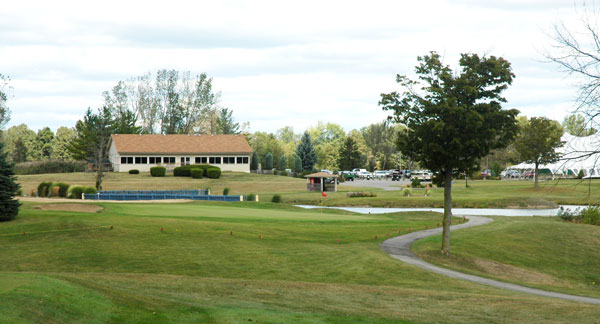
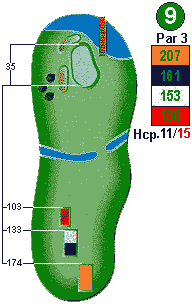
![hole-08](https://www.pebblewoodgolf.com/3292070/wp-content/uploads/sites/7197/2018/11/hole-08.gif)
Hole 9
Pay attention to pin position when selecting a club. The green is very deep.
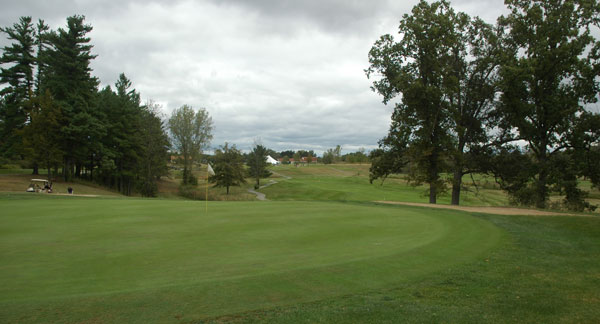
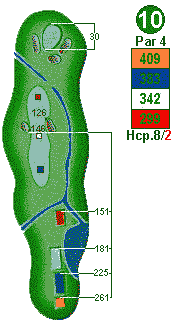
![hole-09](https://www.pebblewoodgolf.com/3292070/wp-content/uploads/sites/7197/2018/11/hole-09.gif)
Hole 10
Take an extra club or two to compensate for the uphill second shot.
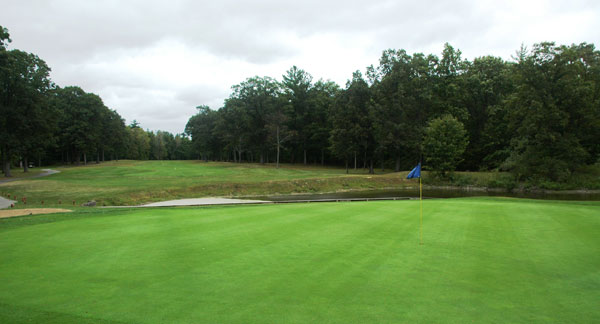
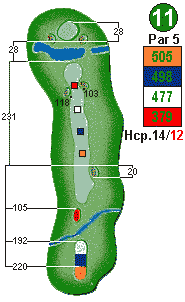
![hole-10](https://www.pebblewoodgolf.com/3292070/wp-content/uploads/sites/7197/2018/11/hole-10.gif)
Hole 11
Lay-up short of the water with your second shot to have a chance for birdie or par.
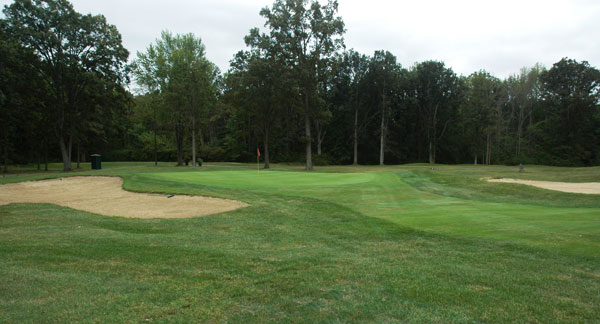
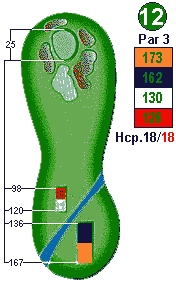
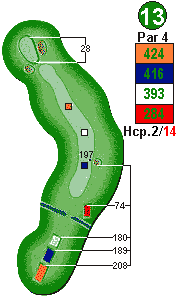
![hole-11](https://www.pebblewoodgolf.com/3292070/wp-content/uploads/sites/7197/2018/11/hole-11.gif)
Hole 12
A great chance at par as long as you avoid the bunkers.
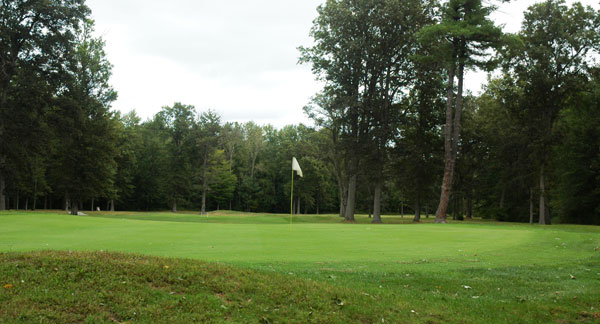
![hole-12](https://www.pebblewoodgolf.com/3292070/wp-content/uploads/sites/7197/2018/11/hole-12.gif)
Hole 13
Tee shot must be long enough to avoid left side tree lined approach shot.
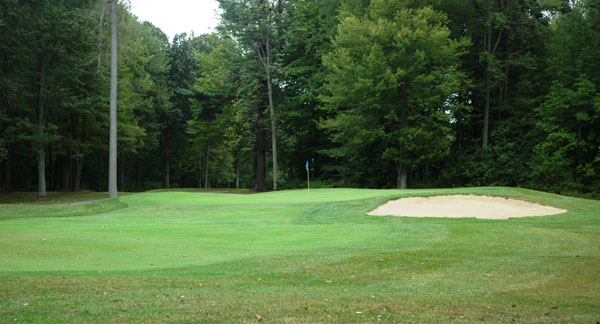
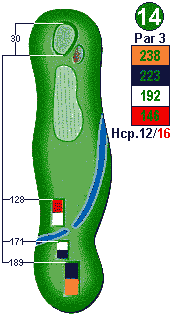
![hole-13](https://www.pebblewoodgolf.com/3292070/wp-content/uploads/sites/7197/2018/11/hole-13.gif)
Hole 14
Take enough club to get it home on this long par 3.
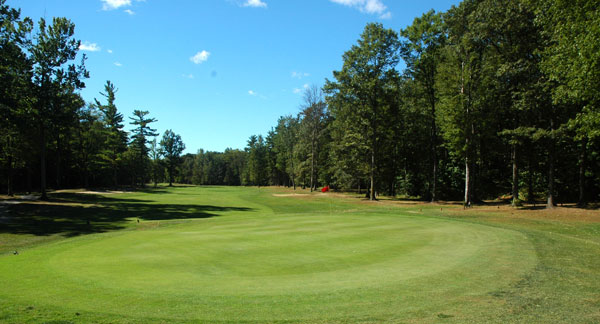
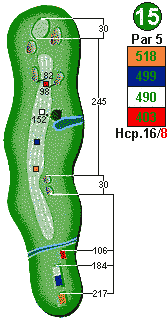
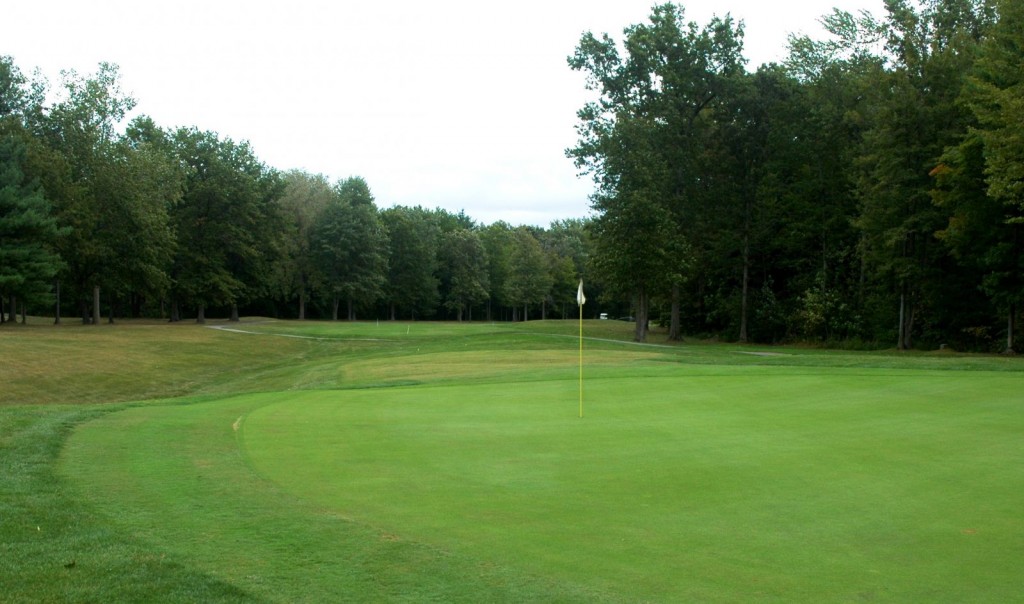
![hole-14](https://www.pebblewoodgolf.com/3292070/wp-content/uploads/sites/7197/2018/11/hole-14.gif)
Hole 15
Avoid the trees bordering each side of the fairway for safe play.
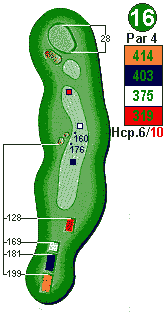
![hole-15](https://www.pebblewoodgolf.com/3292070/wp-content/uploads/sites/7197/2018/11/hole-15.gif)
Hole 16
A solid drive in the fairway is required on this long dogleg left.
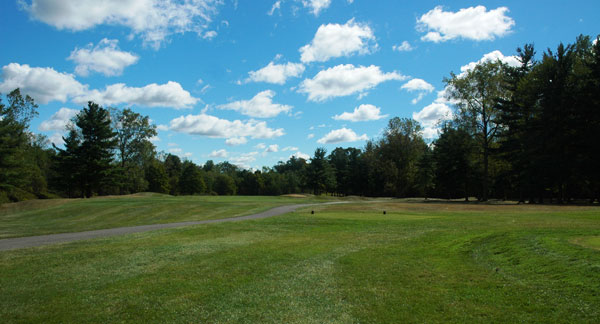
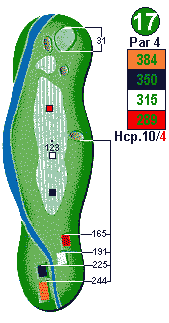
![hole-16](https://www.pebblewoodgolf.com/3292070/wp-content/uploads/sites/7197/2018/11/hole-16.gif)
Hole 17
Avoid the creek guarding the entire left side from tee to green.
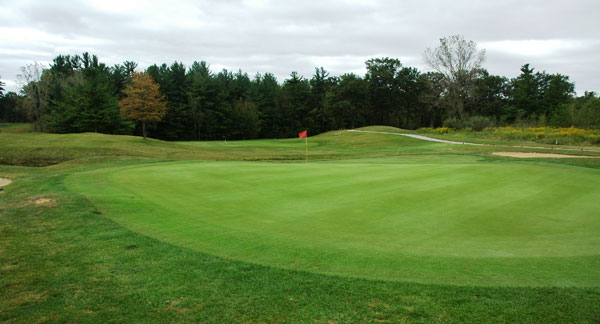
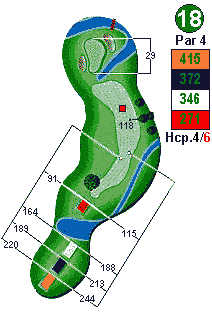
![hole-17](https://www.pebblewoodgolf.com/3292070/wp-content/uploads/sites/7197/2018/11/hole-17.gif)
Hole 18
Keep tee shot left and be careful of the water guarding the front right of this slightly elevated green.
![hole-18](https://www.pebblewoodgolf.com/3292070/wp-content/uploads/sites/7197/2018/11/hole-18.gif)